Rose can be seen everywhere in the streets and alleys. Every summer in Huahua village, when neighbors prune their branches, everyone will exchange some varieties they don't have and go home to cut them. Now there are about 50 varieties in front of Huahua's own house!

1. The most active part of rose cutting, of course, is the branch after the flower, the remnant flower and the following 2 leaves can not be used, cut.

2. Cut the branch into several small sections, with the upper part flat above the bud point and the lower part 0.5-1cm away from the bud point obliquely. The cut is smooth and cannot be rough. Tip: be sure to use a very sharp blade or scissors, and use a lighter to bake and disinfect in advance.

3. Cut off the redundant leaves on the branches, leaving only 1-2 leaves in each section, and cut half of each leaf to reduce water evaporation, otherwise the branches are easy to dehydrate and lose activity.

4. The outdoor branches are inevitably affected by some germs, so it is necessary to immerse all the treated branches in carbendazim solution for 10-15 minutes to disinfect them.

5. After disinfecting the branches, we dilute the rooting agent with water, then mix it into the bottom ash of the pot (plant ash) and stir it into paste, apply it to the oblique incision at the lower end of the branches, disinfect and promote rooting.

6. Put the treated branches and cuttings into the soil soaked in advance. The soil can be vermiculite, perlite, peat soil, fine sand, rice husk carbon, etc. one principle is clean and ventilated, no bacteria, many people do not work well in disinfection if they cut rose.

7. After cutting, spray water on the leaves to keep them moist, and then put them in a cool and ventilated place. Do not expose to the sun. Spray water on the leaves 1-2 times a day to keep the soil slightly moist. Put a tray at the bottom of the basin, and add water in the tray, so that the soil can automatically absorb water from the permeable hole at the bottom of the basin. They can also be put into a large plastic bucket to moisturize.

8. Indoor cutting, temperature not higher than 28 degrees, not lower than 20 degrees, about 15 days can take root.

9. After rooting, it can be transplanted into a big pot!

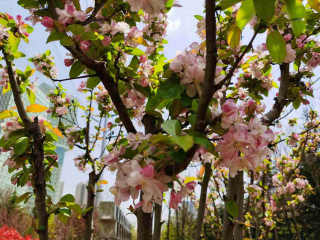
Southern flower friends see the triangular plum blossom wall on the side of the road, do you want to move home? Don't envy, learn the following cutting methods, you can also have a triangular plum wall, hurry up!

1. Prepare some air permeable and loose soil before cutting. You can use peat soil mixed with vermiculite and river sand.

2. Select the healthy branches of Prunus deltoides for more than one year, cut them into several segments, each segment is about 7-10 cm, with 1-2 buds, most of the leaves are removed, only 2-3 pieces can be left, reducing water evaporation.

3. Dip the lower end of the branch with water, then dip it with rooting powder, then insert the lower end of the branch into the soil, and then pour water through it.

4. After cutting, cover a layer of fresh-keeping film on the top of the flowerpot, and put it in a cool and ventilated place. Now it's hot, you can pierce a few holes on the film for ventilation. After about 2 weeks, the branches of Prunus deltoides will take root, and then transplant them into the flowerpot!

Huahua has heard from Huayou more than once that she wants to grow Wisteria. Actually, it's not difficult to cut Wisteria. If you see a neighbor, you can ask for a branch to cut it!

1. Cut the thick and healthy 1-2-year-old Wisteria vines, each cut into about 15 cm of cuttings.

2. If there are leaves and new buds on the cuttings, they should be cut off to prevent nutrient consumption. Then soak the cuttings in carbendazim solution for 5-10 minutes, and then immerse the lower part in rooting water solution for 20-30 minutes.

3. Soak the branches and insert them into the soil directly at the bottom. The soil is not required to be too big, clean and free of germs. It's better to spread them in the sun for 2 days in advance.

4. The upper cut of the branch shall be wrapped with plastic bags to avoid evaporation of water and affect the survival.

5. Put the cut flower pot in a cool and ventilated place, do not expose it to the sun, keep the soil slightly moist, and if there is no long root, nip out the buds as soon as possible.

6. The rooting of Wisteria is slow. It will take about 1 month. You must be patient. After rooting, you can let it sprout. When you see the sun, it grows very fast!

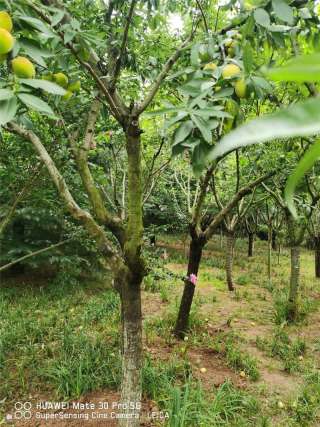
Recently, it is figs that have been on the market. They are delicious, expensive, and hard to store. They are not very fresh in the market. If you can grow a fig at home and eat it when you pick it, isn't it cool? When you don't eat fruit, the leaves of figs can decorate your home, which is more beautiful than the common foliage plants.

1. Figs can be cut all year round (except in winter in the North). When cutting, you should cut the branches that are thick and free of diseases and insect pests. Each branch is about 15-20cm, with 2-3 leaves on it.

2. Soak the cut branches in clean water for 2-3 hours, clean the dust and dirt on the surface, and then put the lower end of the branches in rooting agent solution for 6-10 minutes.

3. The highest success rate of fig cutting is river sand. Before river sand is used, it is better to rinse or expose it with carbendazim to kill bacteria.

4. Find a plastic bottle, cut off the top half of the bottle, leave only half of the bottle, and pierce a few permeable holes at the bottom of the bottle, fill the bottom half of the plastic bottle with river sand, water and pour through.

5. Poke a few small holes in the river sand with your fingers, insert the lower part of the processed fig branches into the small holes, then compact the sand around the holes slightly, and finally place it on the East and West balconies with astigmatism and ventilation.

6. Now the temperature is high and the rooting is fast. It will take about 10-20 days to take root. We can see the white root clearly through the wall of the plastic bottle.

7. Cut the plastic bottle, take the rooting figs with the original soil, and transplant them into the deep flowerpot intact. Pay attention to ensure adequate light and water, see a little wilt on the leaves, but do not water.

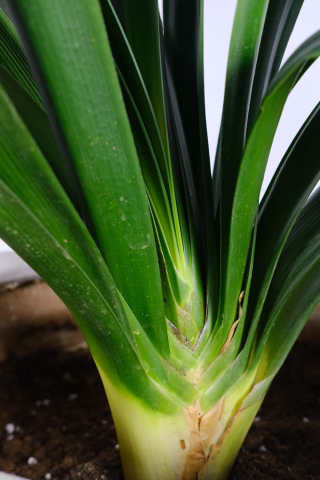
Osmanthus has a good smell and is also a hot flower, but it's a little expensive. However, you can use those osmanthus trees on the side of the road, sometimes you can pick them up as soon as you can.

1. The branch of Sweet osmanthus cutting, the best is the stronger woody branch of that year

2. The soil of Sweet osmanthus cutting can be peat soil, mixed with a handful of sand, or vermiculite, which can keep water and breathe.

3. Cut the branches of Sweet osmanthus into 10-20cm long cuttings, leave 2-3 leaves at the top, remove the leaves at the bottom, and cut them into horseshoe shape.

4. According to the plant spacing of 6cm × 6cm, insert the lower end of the branch into the soil, and the part in the soil accounts for about 2 /3 of the length of the branch.

5. Put the cutted branches in the place of astigmatism and ventilation, cover with film, and often spray water to improve the humidity.

6. Generally, a branch can take root!

Rhododendron is also a very common flower in the national green belt. There are many varieties, and the flowering season is different. If you have a favorite variety, you may as well wait for the green master to prune, pick up one branch and try cutting at home according to the flower method!

1. The cutting of Rhododendron can be carried out in a year. The activity of branches is the strongest in August to September and April to may, and the temperature is suitable. The survival rate of cutting is very high.

2. Rhododendron cutting soil, generally in accordance with peat soil: garden soil: coconut bran = 4:3:3, mixed preparation, before the official cutting, first the soil to pour through, and then in the soil surface to insert a number of small holes.

3. Use sharp scissors to cut the robust and disease-free branches of Rhododendron. The length of branches is about half a year to one year.
Cut the branches into a number of small cuttings, each about 8 cm, the lower leaves are all cut, the upper leaves are cut half. Place the lower part of the pruned branch in the rooting powder solution for about 5 minutes.

4. Insert the Rhododendron branch into the small hole, slightly compact it, and then pour it into the water for one time, and spray it with carbendazim solution to sterilize it.

5. After cutting, spray water to keep moisture, cool and astigmatism, do not direct.

6. Keep the soil slightly moist. When the soil is a little dry, spray water quickly. In about 3-4 weeks, the cuckoo will take root! After rooting, transplant it into a flowerpot.

Camellia is a big and beautiful camellia, which is also liked by many people. There is a variety control around Huahua. When you see a variety that you don't have, you have to exchange branches and cuttings with others. If you don't reach your goal, you will never stop. It's just insane.

1. The branches of Camellia growing in half a year are the most easy to survive. The buds between the leaves are plump, and there are no diseases and insect pests.

2. Cut the branches of Camellia into several small sections, remove the bottom leaves, keep 2 leaves on the top, and cut half of the two leaves, put the pruned branches in the carbendazim: water = 1:1000 aqueous solution and soak for 5-10 minutes.

3. The substrate for cutting Camellia can be sand or perlite. Put the sand into the basin, water it, and poke holes on it with a stick.

4. Insert the branch into the hole, bury the soil, compact it, water it once, then cover it with a layer of fresh-keeping film, put it in a cool and ventilated place, open it at noon every day and keep it full, spray water once to keep it moist. A few weeks can take root, after taking root transplanting into the flower pot normal maintenance can be!

Hydrangea is very common on the North Road. It's very spectacular when it's in full swing! Huahua can't help taking photos every time she passes by. In fact, the hydrangea just failed, it is a good season for cutting, we hurry to use it!

1. Use a sharp knife to cut off the branches of Hydrangea that have been cut. Be sure to cut them as fast, accurate and firm as possible, at a 45 degree angle, so that the incision is as smooth as possible.

2. Leave 2 blades above the oblique cut wound, and then cut them flat above the blade.

3. Cut half of the two leaves to reduce water evaporation.

4. Insert the treated branches into the loose and permeable sandy soil, water the soil with carbendazim solution once, spray water on the surface of the soil 1-2 times a day for moisturizing,
2. Cut short the branches of Hibiscus, about 5-8 cm each, soak in carbendazim solution for about 2-5 minutes, and then take it out to dry.

3. Prepare perlite and vermiculite, mix them according to the ratio of 1:1, then put them into disposable paper cups, and pour them through.

4. Insert the branches into the soil and put them in a cool and ventilated place. Do not expose them to the sun.

5. In a few weeks, little Hibiscus will take root!

6. in addition to using soil cuttings, it is also easy to plug roots with foam water.

7. After rooting, little Hibiscus can be transplanted into a flowerpot for maintenance. After that, it should be placed in a well lit place to receive sufficient light and maintain ventilation.

Changchun flower is also a common flower in the green belt, and it is very easy to cut and grow.

1. Cut off the healthy shoots of Changchun flower, about 5-7 cm. If there are no pests, half of the leaves will be cut.

2. Find a plastic bottle, buckle a square hole in the middle of the bottle, fill the hole with vermiculite, pour water through it, and then insert the Changchun flower branch into vermiculite.

3. Put the cut Changchun flower in the place of astigmatism and ventilation, and often spray water to keep moisture.

4. About 10-15 days or so, Changchun flower can produce white root system! After rooting, transplant it into a big pot and raise it!