Spring is coming, gardenia should grow again, and cutting is also the most easy to root at this time, don't try soon?

1. Prepare a large coke bottle, and use scissors to cut a knife from the top half of the bottle. Be careful not to cut it completely, just leave a part on one side.
2. Prepare Gardenia branches for cutting. It is better to choose robust semi lignified branches with a length of about 7-10CM. One or two leaves can be left on the branches, and the lower end can be cut at an angle of 45 °.
3, prepare a foam board, cut the foam board into a round shape similar to that of a cola bottle with scissors, probably a little smaller than the diameter of the cola bottle, then insert the cuttings into the foam board.
4. Put the foam board in the coke bottle, add water, and dip the lower part of the Gardenia in the water. Because the foam board will float on the water surface, the blade will not decay. Finally, seal the opening of the bottle with adhesive tape, close the cap, and poke holes in the cap for ventilation.
5. Put the coke bottle in the place where the indoor solar energy shines, the Gardenia leaf in the bottle will carry out photosynthesis to promote rooting. If the more water drops are produced on the inner wall of the bottle, it proves that the higher the temperature in the bottle, the faster the rooting will be.
6. It only takes about 7-10 days for Gardenia cuttings in Coke bottles to produce white flower roots.
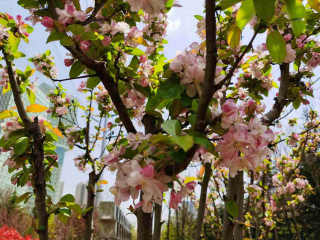
The flower color of triangle plum is various. It will bloom for half a year. If it can be grafted, it will be colorful and beautiful!

1. Buy some transparent acrylic pipes, and then cut them into small sections about 7-10CM long with a knife for standby.
2. Prepare robust boughs of boughs of boughs of boughs of boughs of boughs of boughs of boughs of boughs of boughs of about 2cm at the lower end, so as to prevent them from rotting. After that, wrap the cut non-woven fabric around the boughs, and make one end of the fabric flush with the lower end of the boughs.
3. Insert the boughs of Prunus deltoides and non-woven fabric into the plexiglass tube, which can not only ensure the moisture and air permeability of the boughs, but also prevent the boughs from rotting.
4. Prepare a plastic plate, add 2cm water in the plastic plate, and then add some rooting powder to stir, and then put the prune in
5. In about 5-7 days, there will be a lot of small white spots at the bottom of the triangle plum cuttings. At this time, you can prepare the basin, or wait until the little white dots come out, become the root system, and then the basin.
6. Cut the napkin into strips, moisten with water and wrap the branches around the roots. Wrap the branches with toilet paper. When cutting, it can temporarily isolate the contact between the organic matter in the soil and the tender root system, which is more conducive to rooting.
7. The cutting soil can prepare perlite, vermiculite and peat soil. Cut the plastic bottle, iron 3-5 holes evenly at the bottom of the bottle, then put vermiculite on the bottom, and then fill the plastic bottle with the nutrient soil mixed with peat soil and perlite.
8. Put the branch into the nutrient soil of the plastic bottle, cover the seedling with the upper end of the plastic bottle, water it once and put it on the windowsill with the sun. In less than 1 month, you can see the root system of the plum pierce out from the bottom of the plastic bottle.
9. Use scissors to cut open the plastic bottle, pay attention not to scatter the soil carried by the root system as much as possible, and then transplant it into a larger flowerpot, put it in a cool and ventilated place for 1 week, and then put it directly in the sun.
Recently, flowers have been pruned and many branches have been left. These branches can take root when they are thrown into water, and soon they will become a new kind of pothos!

1. Select the robust branches of the pothos, and then cut the branches into about 5-7cm segments.
2. Prepare a small bottle of water. The water level is about 2 /3 of that of the bottle. Then insert the lower end of the branch into the water and put it in the place with bright scattering light.
3. It only takes about a week for a little root to emerge.
4. After rooting, the pothos can be kept in the bottle for maintenance, and the loose and breathable nutritious soil can be prepared. Transplanting the rooted pothos into the flowerpot for soil culture can make the pothos grow!
Many flower friends have a long life at home. When they fail to bloom recently, they should not lose the branches they cut when pruning. Just take some water and insert it into a pot of new long life flowers in minutes!

1. Select the robust branches from the pruned long-lived flower branches and trim them slightly. Leave 2-3 leaves on each insert.
2. Soak the branches of Florist Kalanchoe in the rooting water for about 20 minutes, dry them and insert them into the water, dip the lower end of the branches with a little water, and then put them in a place with good scattering light for curing.
3. It only takes about 7-10 days for the long-lived flowers to grow white roots.
4. After rooting, you can choose to continue to maintain in the hydroponics bottle, watch the white root system, or directly transfer it to the pot for soil culture, and it will explode soon!